How to Animate Instagram Stories in Photoshop
Instagram Stories are a great tool for connecting with your Instagram audience in a real, authentic way. Popping up on Instagram Stories not only helps you stay top of mind, but it can also tie a storytelling component into your social media strategy.
Your audience loves to know about who you actually are – not just photos of your work. Sharing a peek into your work process, sharing your journey and even featuring your pups (you know that I sure do!) can really show your audience who you are as a business owner.
Although Instagram Stories have a reputation for being more laid-back than an in-feed post, going the extra mile with Stories content will really catch your viewer's attention.
Ready to create more engaging Instagram Stories? Here’s a quick tutorial on how to design animated Instagram Stories in Photoshop!
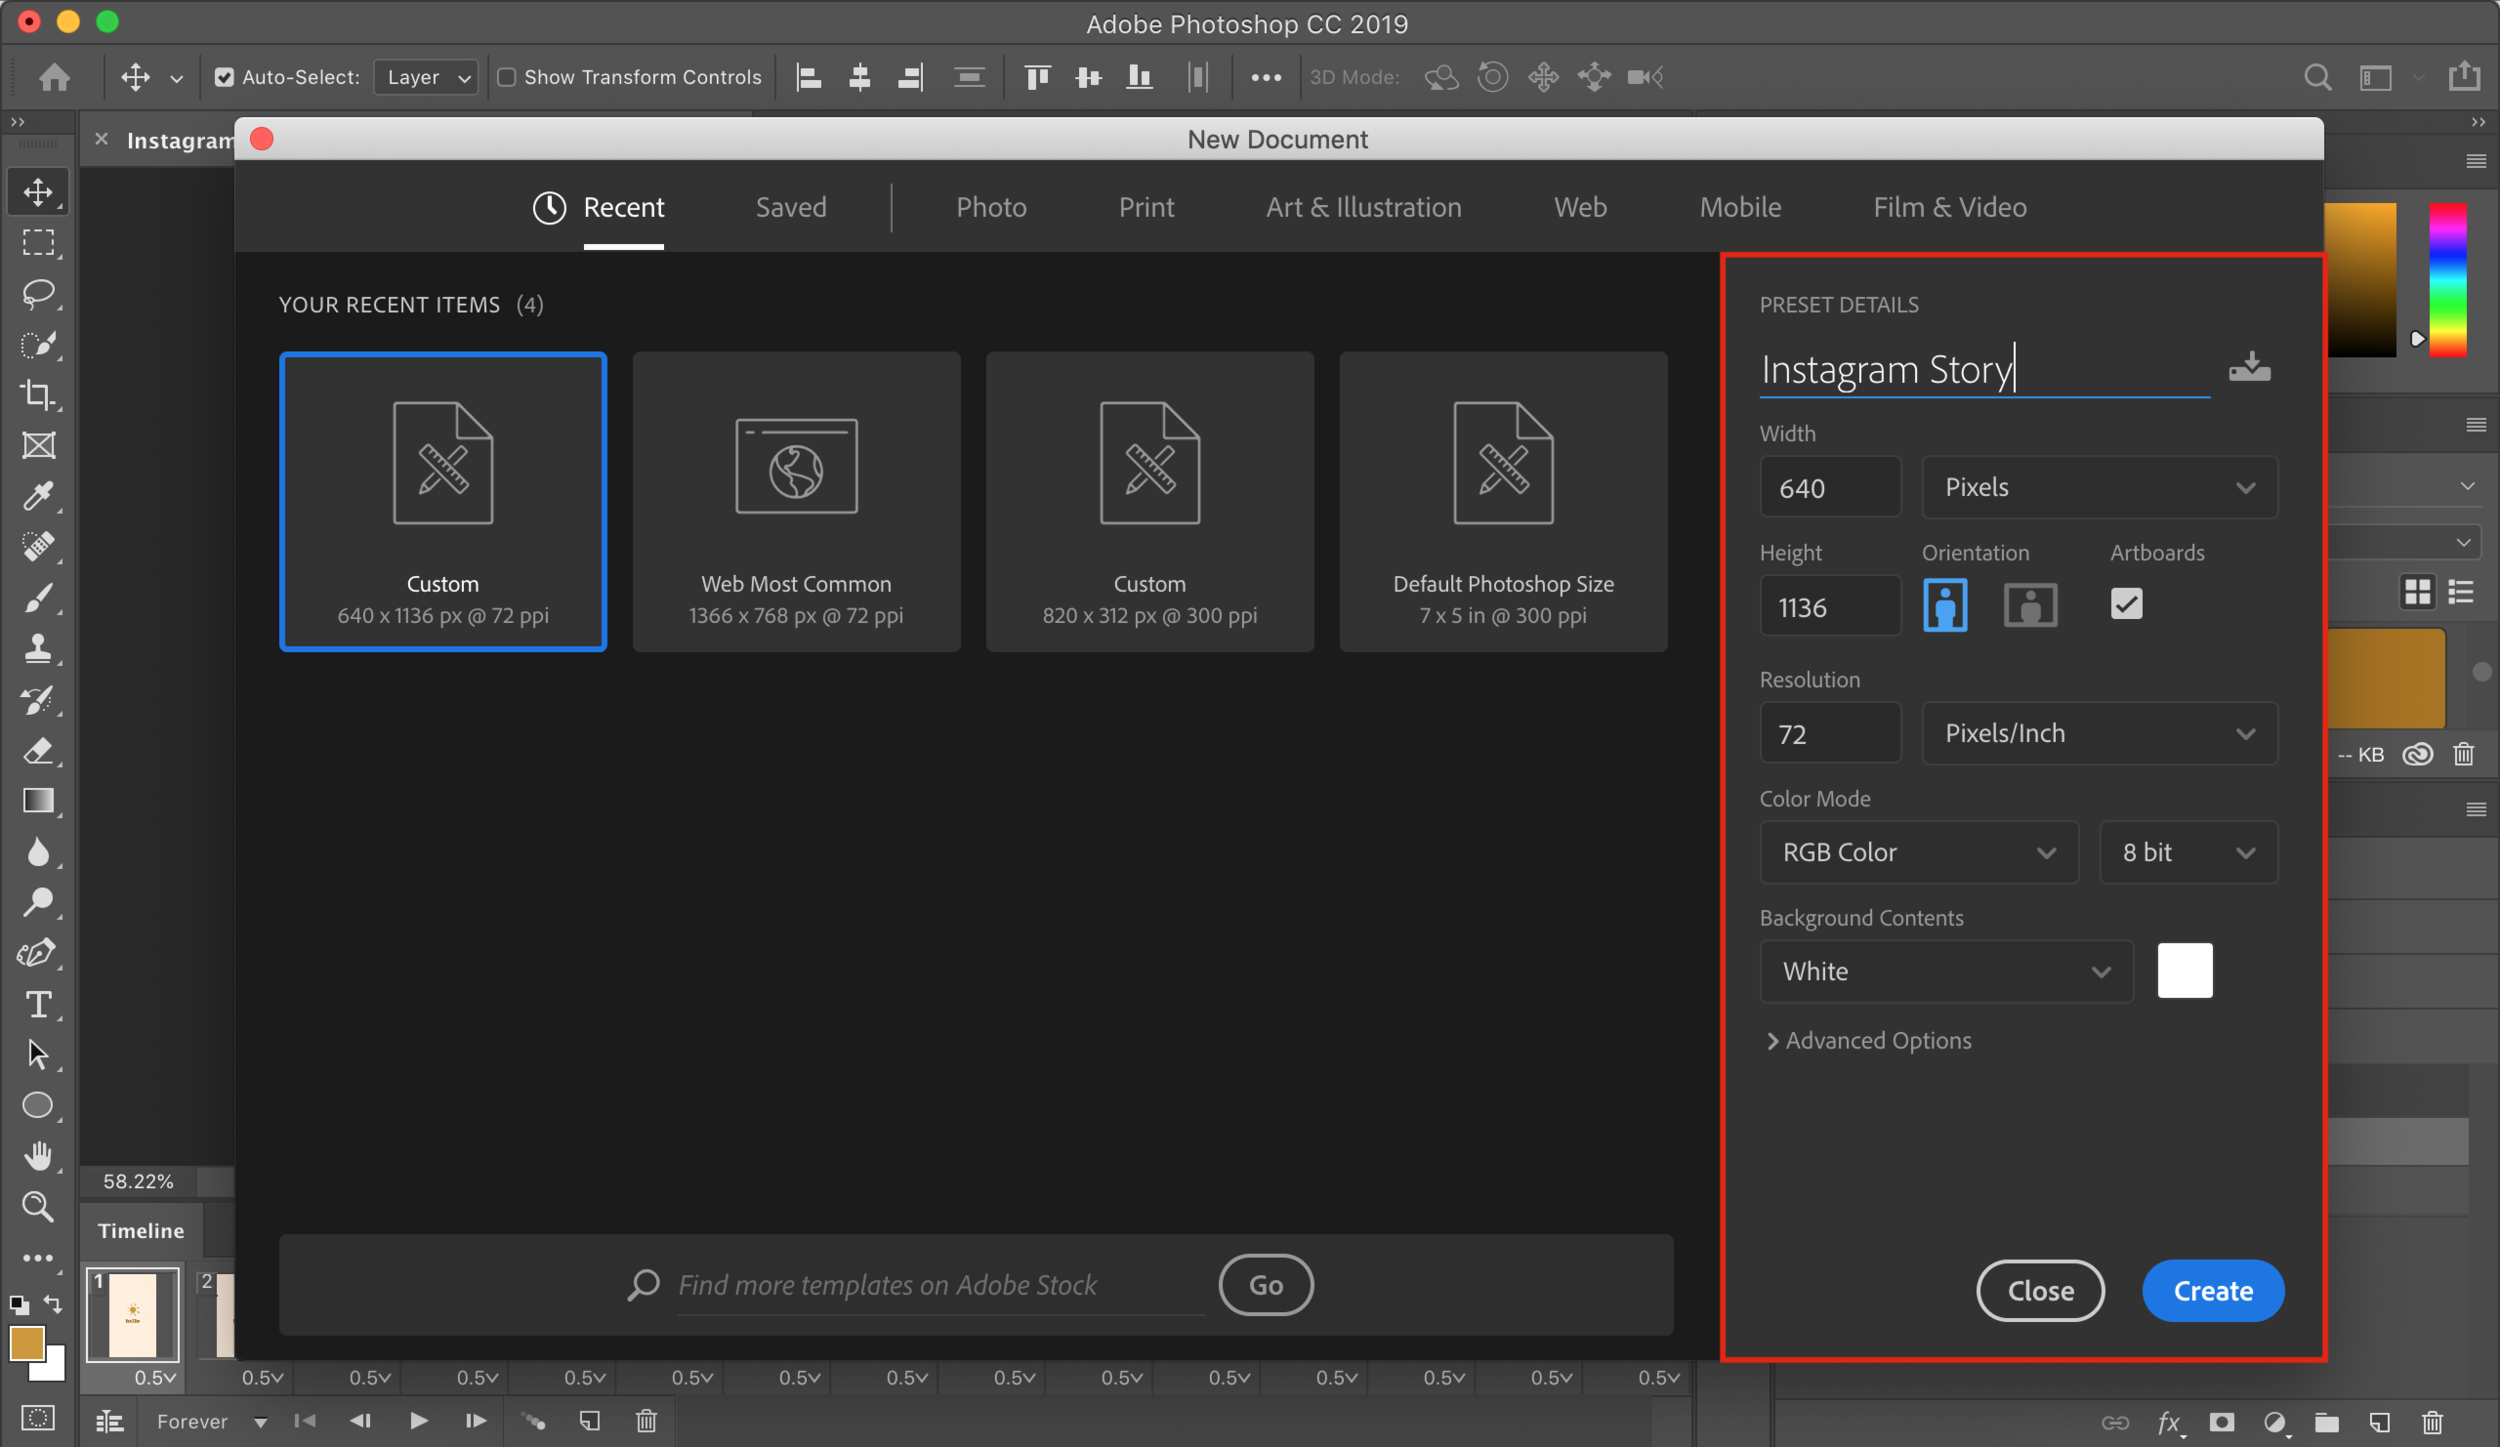
Step 1: Create a 640 x 1136 canvas in Photoshop.
Step 2: Design each 'frame' of your Instagram Story as a separate layer.
Step 3: Once all the frames of your story are complete, open the Timeline tool in Photoshop by clicking Window > Timeline.
Step 4: Next, click 'Create Frame Animation,' select the top right hand icon and click 'Make Frames From Layers.' This will create layers that can then be animated into a video.
Step 5: Set the timestops for each frame of your Instagram Story. We recommend 1 second each for the most impact.
Step 6: Once you like how your animated Instagram Story plays out, save it as a video by selecting File > Export > Render Video within the same proportions as the image canvas.
Voilà! Now you have an engaging, animated Instagram Story to share with your audience. These can be so fun to make and can easily pique the interest of your followers without devoting a ton of time to content creation. I hope you loved this tutorial – let me know if this was helpful for you in the comments below, or if you have any additional questions!


